First things first, you’ll need to gather all the supplies before you start your project. You will need the following items to complete one 3D kandi cuff:

- Pony beads of various colors to match your charm and pattern (all bead counts are for a size 33 cuff)
- Inner Cuff: Main color-132, Accent-55
- Middle X Pattern: Outer-88, Inner-88, Middle-22
- Outer X Cuff: Outer Layers- 44, Middle Accent- 11
- Elastic (I use 1mm fabric covered elastic as pictured left)
- Plastic yarn needle
- Scissors
- Charm or plastic figure
- Lighter
- Sharp quilting needle
- Optional small cups to separate out beads by color
 Next you are ready to come up with a pattern and start your 3D kandi cuff. Begin by selecting two colors and stringing them on to elastic in the following pattern two main color (in this example hot pink) and one accent color (in this example navy blue). Repeat two main beads one accent bead until the end. By the end you will have a total of 11 sets or 33 beads. Test this single on your arm for fit. Adjust the pattern by sets of three to increase or decrease the size. I find that 33 is a good size for the upper arm of a smaller women, for guys upper arms I would go up to 39 beads or 13 sets. Tie this single off with a double knot once you have adjusted the size for your arm. Do not cut the elastic, you will need almost the whole card for this one project. Feel free to adjust the colors to fit the charm you want to add on or just your favorite colors.
Next you will string three beads on the elastic: one main bead, one accent bead and another main bead. Then take the needle with the elastic threaded on it and put it through the first accent bead to the left of where you tied off the single. Pull the needle through tightening up the loose elastic but don’t pull it too tight.

Repeat this pattern over and over through each accent bead with one main bead, one accent bead and one main bead stringing in through the next accent bead on the base single. Continue with this pattern in a counter clockwise rotation until you reach the last accent bead on the base single.


Continue this pattern adding more and more rows. The cuff will fan open as seen in the picture to the left but don’t worry, the cuff will start to take shape around row three. Ensure you keep the elastic tight, but not to tight. The fanning out effect will be fixed when the last row is added to the inner cuff. Keep adding rows until you get your desired height. For the example shown I have five rows and then the closing or top row.


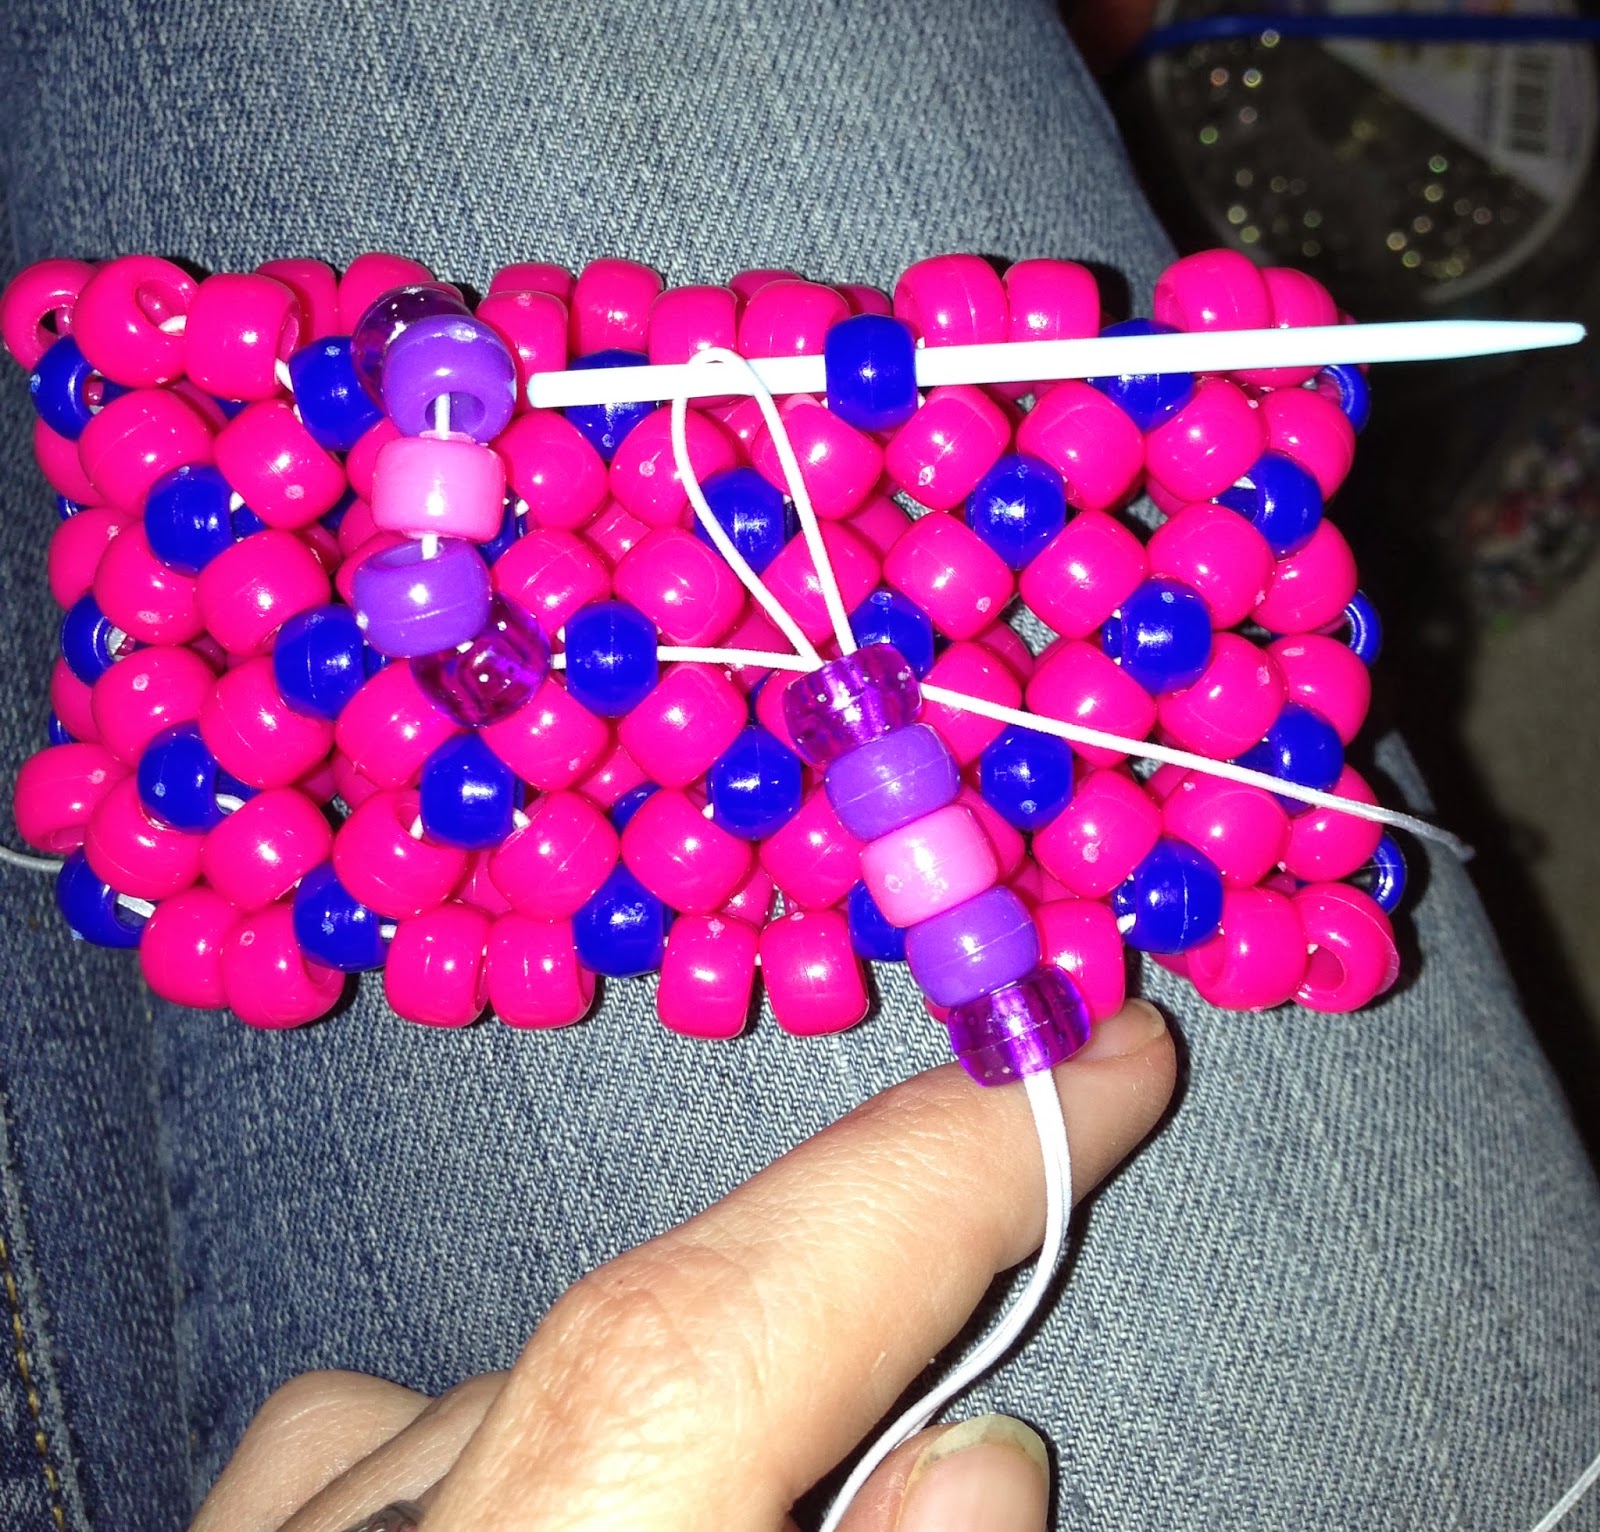
Once you have completed the zig zag pattern all the way around the top of the cuff you will cross back over to make an X pattern. String one outer and one inner bead on to the needle then put the needle through the middle bead and string on one inner and outer bead and string through the third diagonal accent bead on the base cuff. Follow this same pattern going through the middle bead each time to create an X pattern with the beads.


Select your last pattern of beads. For the outer X pattern you will need to place the beads in the following order first outer bead (neon pink), second outer bead (clear pink), first inner bead (glitter), second inner bead (clear purple) then string the needle through the middle accent bead (purple star)first outer bead, second outer bead, first inner bead, second inner bead, middle accent bead, second inner bead, first inner bead, second outer bead, first outer bead then string the needle through the middle bead. Follow this order with the zig zag pattern stringing the needle through the middle bead each time.

Once you complete the zig zag all the way around go back the other way again completing the X pattern. String the beads in the following pattern first outer bead, second outer bead, first inner bead, second inner bead then string the needle through the middle accent bead, once through the accent bead follow the pattern second inner bead, first inner bead, second outer bead, first outer bead then through the middle of the X on the lower level of the cuff. Follow this order until you get to the second to last X.

On the last X string add on the charm you want to use. In the example I used a plastic Hello Kitty figure and turned her into a bead by heating up a needle and poking a hole through her soft plastic head. I then strung her following the same patter as the beads before tying the cuff off with a triple knot. You can add letter beads or other accents to the pattern if you want to make it more personal and original.

The final product. A Hello Kitty 3D Kandi Cuff.


I hope you found this tutorial helpful and easy to follow. If you have any questions or comments, and/or tutorials you would like to see, or want to trade PLUR packages please get a hold of me at rose.the.raver@gmail.com. Hope to hear from you soon. Now go get crafty and spread PLUR!
Very kawaii :3
ReplyDelete